text and photography by John Pfanstiehl
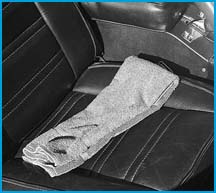
One of the most useful Corvette accessories can be found at Wal-Mart or Sears - a towel. Both T-tops and convertibles have an established reputation for leaks. If you don't stay dry while driving your Corvette in a heavy downpour, this quick fix is for you.
One of the more annoying leaks originates at the cowl, just below the windshield. The terminus of the water path is a point above your feet or your passenger's feet. In addition to the aggravation of a steady drip, the unwelcome water entry can create a humidity level inside your car which exceeds rain forest levels while accelerating the rusting of your Corvette's steel reinforcements. Like high blood pressure, this rusting is a hidden problem which can cost you plenty down the road. In fact, replacement of the windshield frame and cowl reinforcements can be one of the most expensive repairs on a Corvette.
Follow along and we'll show how to rebond your panels and eliminate some of the most common leaks with just a few dollars worth of materials from the local hardware store.
Direct a small stream of water to check different areas for leaks. Start at the downstream areas first, and allow the water to flow in any one spot for over a minute because it can take that long for the water to seep through. If water drips down on your passenger's feet, the problem is probably in the cowl area just below the windshield. If the water seems to be coming out from behind the kick panel, it may be as simple as a missing screw. The screw which attaches the front of the kick panel is hard to reach and usually has been left out. Water can stream in through the empty screw hole.
 Have an assistant watch for leaks while water testing. The
interior lamp sockets can be removed from their brackets and make a handy small
drop light for use in this area. Remove the kick panels to better view the
source of the leak. The factory sealers have long since dried up and cracked on
this Corvette. This doesn't necessarily mean that area has a leak; the sealer
was used a second barrier where panels were bonded together. The area just under
the lower edge of the windshield is a common trouble spot for leaks. On this
car, the leaks were fixed by applying black silicone sealer around the wiper
pivot and all the way up to the windshield.
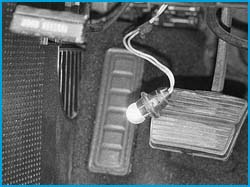
Have an assistant watch for leaks while water testing. The
interior lamp sockets can be removed from their brackets and make a handy small
drop light for use in this area. Remove the kick panels to better view the
source of the leak. The factory sealers have long since dried up and cracked on
this Corvette. This doesn't necessarily mean that area has a leak; the sealer
was used a second barrier where panels were bonded together. The area just under
the lower edge of the windshield is a common trouble spot for leaks. On this
car, the leaks were fixed by applying black silicone sealer around the wiper
pivot and all the way up to the windshield.
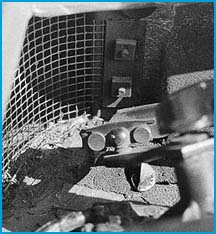 Remove the wire screen in order to seal the areas behind it. Two bolts
hold it from the front, and another attaches it under the windshield. A paint
stick helps spread and smooth the sealers in these out-of-the-way areas.
Remove the wire screen in order to seal the areas behind it. Two bolts
hold it from the front, and another attaches it under the windshield. A paint
stick helps spread and smooth the sealers in these out-of-the-way areas.
Sealer can also be used between the windshield and the upper panel. Some Corvettes had a rubber strip inserted here to help channel water forward. It can help to thoroughly seal this area to prevent water from going down onto body seams which can't be accessed for waterproofing. Place masking tape to the paint and to the glass to make a neat looking edge on the silicone.
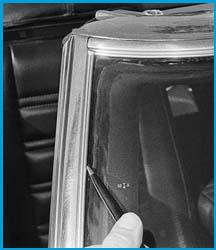 Sealing between the windshield and the stainless steel
trim pieces often cures water leaks on Corvettes. This is an easy fix for the
underlying problem of a poor seal between the windshield and its frame or when
the frame is rusted through in places. If black silicone is used, the repair is
hardly noticeable. Apply masking tape on the glass about 1/8th inch away from
the molding before squeezing the silicone in between the molding and the glass.
After it's applied, use a finger to smooth the silicone. It is not necessary to
put silicone in the channel of the molding.
Sealing between the windshield and the stainless steel
trim pieces often cures water leaks on Corvettes. This is an easy fix for the
underlying problem of a poor seal between the windshield and its frame or when
the frame is rusted through in places. If black silicone is used, the repair is
hardly noticeable. Apply masking tape on the glass about 1/8th inch away from
the molding before squeezing the silicone in between the molding and the glass.
After it's applied, use a finger to smooth the silicone. It is not necessary to
put silicone in the channel of the molding.
Black silicone can also be used to repair damaged rubber weather strip. It's common for the upper portion of this weather stripping to deteriorate with its exposure to the sun.
![]()
Copyright(c) 1997: Dobbs Publishing Group.